I began this session at 8:40am with small repairs. Learning these is a matter of practicing technical abilities because I already have a small amount of experience with them from taking the Repair Decisions workshop.
I got to see how my paper repairs from the last session turned out, and it seems as though there is an issue with the heat set tissue reacting with this paper.


I got to see how my paper repairs from the last session turned out, and it seems as though there is an issue with the heat set tissue reacting with this paper.


A case tightening is when the endsheet along with the textblock has come loose from the case. It causes the book's contents to pull and can sometimes lead to the breakage of other parts of the book. It also makes the item difficult to handle as the text block starts to deform with the instability of its holder (the case).

You can check the end sheet to see the text block pulling away from the case.
-To begin the repair, first position the book upright with the case opened to expose the pocket of the spine, where the casing is coming detached.

-Then apply PVA glue to the knitting needle (evenly coat by twirling in the glue container). Run the knitting needle through the interior of the gutter (where the book is loose). Turn the book upside down and repeat. For larger areas, it may be necessary to brush the glue into the shoulder (upper gutter), where the needle may have trouble reaching.

-Then apply PVA glue to the knitting needle (evenly coat by twirling in the glue container). Run the knitting needle through the interior of the gutter (where the book is loose). Turn the book upside down and repeat. For larger areas, it may be necessary to brush the glue into the shoulder (upper gutter), where the needle may have trouble reaching.
-When done gluing, line up the end sheets with the text block, paying particular attention to whether or not the book is rounded correctly.
-Place the book in a press with brass-edge boards on either side; the brass should be in the gutter. If you do not have brass-edge boards, simply use two knitting needles to keep the shape of the gutter while in the press.
Always check to see if the gutters are aligned, and that the book has not shifted before leaving the item to dry. Estimated drying time is an hour, after that take out and place under a paper/buckram covered brick.


Lamination is used to stiffen the covers of paperback books. *As mentioned before, this is primarily used for larger paperback items or items with high use, such as reference materials or items that are replaced annually. The reason to use it only on these items is that in the long run the Kapco product yellows the item (possibly the adhesive, because they use archival plastic-mylar). Paperbacks have a natural fold line around a fourth of an inch from the spine. The mylar back sheet (does not include a long flap) should be measured to the size and cut first.
-Do this by placing the book on the mylar sheet lined up with the natural fold. Make measurement marks at the top of the spine and fore-edge of the book. Take the book away and cut the mylar with the scalpel (start with shallow cuts against a straightedge).
-Start removing the backer from the plastic along the natural fold line (may not be easy to get off) and line up the mylar with the back cover.
-Hold the plastic in place while smoothing it down with a cotton glove away from the spine, slowly making your way to the fore-edge of the book. Do not use a bone folder to smooth the plastic because it tends to scratch it.
-Check the item to see if the sheet extends beyond the cover. If so, place the side with the new cover down on the cutting mat and press the text block together firmly.
-Then lightly run the scalpel over the extra plastic until it is easily pulled away on all sides.
-Repeat the cutting and placing process for the front cover, which should have the extra long flap to extend over the spine.
-Glue down the spine by removing the paper and press your thumbs down along the top edge. Work from the center out on the top edge, then around the spine to the edge and back cover. Make sure to smooth with a cotton glove to further remove air bubbles. There should be overlap on the back cover when you are done.
-Trim the front cover piece of any excess material, as was done on the back.
-To finish off this cover, notch the corners of the cover so that they do not scratch while in use.
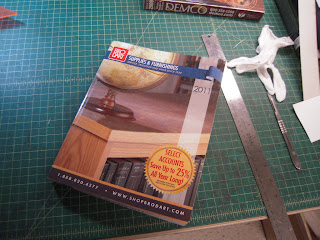
Here is the book I worked on:

Here is the book I worked on:

Before

After-See the marbling effect from the glue?
Sharlane also covered the drill-in sew for thin double fan adhesive materials, which was cut short at the end of the last session. This gave me more of a chance to try my hand at using the machine. The final step of the drill and sew is procuring a new case for the item. For this we selected a binder (same technique as before) and went through the process of sewing the item into the binder.
-First line up the text block close to the bottom edge and mark on the binder tape where the holes are as a reference tool.
-Sew through the binder flaps using the same 5 hole sewing technique as a single signature, except you start and end at the back of the material. This step will likely require a strong needle and needle-nose pliers because of the thickness of the item.


-To finish this repair, match up the slip with the item and place the it on the finished shelf for labeling. Make sure to add a tally mark under the appropriate level of worker and type of repair-hand bind.
Sharlane then demonstrated how to take apart an item for the double-fan glue process. Taking the text block out from the case is a delicate technique that takes practice. Some things to know are:
-Always be gentle, but hold the text block firmly together while pulling.
-When there are tears, go from the opposite side and push the text block away.
This item turned out to be a more delicate item that needed to have a portion hand-sewn because it had center art. When it came to placing the text block in the movable press, Sharlane mentioned that it is key to not tighten the press down all of the way because it changes the shape of the item. That could be a major problem in the long run when you think of all the pages that would have to be pulled further open.
At this point of the day, we worked on hanging artwork display on the main floor of the library. Before we could do this, I found out some of the problems with having a backdoor that a department has to man. The department in the basement has a telephone it answers to let people into the loading dock, which must be nearby all day. The loading dock requires a staff member’s id to open and close. When every person is sick or out from that department, the task is left to the next closest department. The main issue with this is that the phone reception cannot reach beyond the staff area, making it impossible to go anywhere else in the building-no matter prior obligations and deadlines. For a short bit, we had to have one person run up to pre-measure the monofilament (20lb fishing line) and cut pieces that would be able to work for all items.
Another interesting part of the Kelvin Smith Library is that the Preservation Department devised the method of art display, which was not allowed to be hung on the walls. There are two spread out rows of shelving that are used for the display. Each portion of shelving has one shelf on the frame and includes a colored board that has been cut to the size of the frame. It extends from the shelf to about 1 foot from the top of the shelving. Items are hung from the crossbars at the top of the frame. The back of the photo frame is fitted with hangers that the monofilament is looped through so that it can be tied at the top-where it can have a stronger hold (using the square knot again). Because of the parameters of the display, it takes quite awhile to position each photo and puts physical stress on those attempting to hang the item. The internship student and I helped hold the items while Sharlane tied them at the top, each having a hand in the positioning of the end result.
This day also included a sort of tour of the Special Collections department. The head of special collections gave us an overview of the history of books with visual aids. Here is a description of some of the key items:
-We started with items such as Sumerian clay tablets from 2044 BC that would have be used to record business transactions of what people owned or were owed.
-After that we viewed a few pieces of papyrus that had been reclaimed from the trash in Egypt . One of the pieces included copied portions of Homer’s Odyssey, which may have been used to learn to write letters.
-One item type I knew much less about is the Asian accordion scrolls, which are scrolls that have been chopped into pieces and bound together. These were normally used to record religions text.
-We also viewed a book of Confucius, which was handmade with a flexible woven fabric cover.
-There were scrolls from Bali Thailand , which Buddhist monks used for religious texts. These items were like long, slender block of thick pages that had been cut to size and bound in two spots near the center. These items were very fragile because they had survived a fire. They may not be included on the website, because preservation work is still being explored for the items.
-There was an example of a pocket Koran with some gilded lettering and page illustrations. This item would have been owned by the wealthy, unlike most of the other items in this collection.
-Next to it was another religious text, a Flemish Book of Hours. I learned that this sort of item is traditionally used track daily life with hourly prayers and the reason for each one.
-There was an example of a 1482 printing press book with a possible false raise binding.
-The library also has a Lewis and Clark book with the original binding in 1814.
-Some of the most interesting items the Special Collections department cares for is the tiny/mini books. These are items that are two inches or less, with full books printed on the interior. Some were accompanied by magnifying glasses embedded in book cases so that one could read the tiny print.
-We learned that in the early 1900s it was common for people to cut up books to sell some of the pages as scholarly examples for learning history and culture. There is one famous employee of the Cleveland Museum of Art that is known for this because many of the scholarly libraries in the area (including Case Western) have these pages.
One of the things the archivist said is key to being a librarian is keeping up with technology. When noticing my note taking she mentioned that the majority of the collection, including items she showed us, have been digitized and are available on the Special Collections website:
This is one of the books we viewed: http://library.case.edu/digitalcase/BookView.aspx?id=fleboo00
Many of the items we saw can be found under the “History of the Book” sub-collection:
After this tour, we learned about rebacking materials. This is the highest level of repair most student assistants learn while working for Sharlane. The reback is done when the super (or mull) and text are still attached, but the spine is torn. (If the item is also in need of a case tightening, it can be completed in the final stages of the reback.)
-Start by placing your triangle about 1/8 inch from the board beyond the gutter. Do not cut into the gutter, or you will detach the case entirely. Cut the fabric of the cover and through a layer or two of board. Cutting and bringing up the board helps the end result be a little more stable.
-Cut a slit at the top and bottom of the board a little less than a half inch beyond the cut you just made. This enables the full piece of fabric to be pulled up and away from the book’s board.
-Use a micro-spatula to lift the fabric (and if you can a layer or two of board) from end to end, starting in the middle. *If the cover is decorative, cut slits and try popping up the fabric.
-Remove tail fabric, or the left over book cover in the gutter extending around the spine (if it is still intact at all). If the spine is decorative, important to the appearance of the item, or has the title and call number intact, set this piece aside.
-Once the spine is exposed you should see a mesh of material covering the text block. To remove the excess paper put wheat paste over the spine spreading it with a brush to cover the paper. Let the glue soak in a moment before removing the paper with a larger steel mirco-spatula. Be careful to not pull up any of the super (the mesh material) with the paper.
Next week we will finish this repair and move on to creating boxes. I left the library at 4:40pm.
*If any processes are repeated in my blog, it is because they were repeated during my practicum experience. I apologize for any redundancy.
No comments:
Post a Comment